In the rapidly evolving world of live streaming, setting up a reliable RTMP server is crucial for broadcasters and content creators looking to deliver high-quality live video content to their audience. The RTMP protocol remains a fundamental technology in this domain, facilitating the transmission of video and audio from encoders to viewers. This guide provides a comprehensive walkthrough on how to set up a free RTMP server using rtsp-simple-server, a ready-to-use solution that supports various streaming protocols and offers easy integration with broadcasting tools such as OBS and ffmpeg.
Key Takeaways
- RTMP (Real-Time Messaging Protocol) is essential for live streaming, acting as the bridge between encoders and online video hosts, enabling RTMP ingest.
- rtsp-simple-server is a versatile server that supports publishing, reading, and proxying live streams, with the ability to convert between protocols like RTSP and HLS.
- Setting up an RTMP server involves downloading and configuring rtsp-simple-server, managing server paths, and integrating with streaming software like OBS or ffmpeg.
- Advanced configurations of RTMP servers include securing the server, optimizing performance, and customizing endpoints for various platforms, including Twitch.
- The RTMP server’s capabilities can be expanded by incorporating other protocols like WebRTC and LL-HLS for low latency streaming, and scaling for larger audiences.
Understanding RTMP and Its Role in Live Streaming
What is RTMP?
You might be wondering, what exactly is RTMP? Well, RTMP stands for Real-Time Messaging Protocol, and it’s the backbone of much of the live streaming you see online. It’s a protocol designed for high-performance transmission of audio, video, and data between a server and a Flash player. Initially developed by Macromedia, which was later acquired by Adobe, RTMP has been a staple in the streaming world since its inception around 2002.
The beauty of RTMP lies in its persistent connection, which allows for continuous streaming of content. This is crucial for live broadcasts where you want to minimize latency and ensure a smooth viewing experience. Here’s a quick rundown of how RTMP works:
- An encoder captures your live content and sends it to the server using RTMP.
- The server then distributes the stream to viewers, who can watch in real time.
Remember, RTMP is all about delivering your content efficiently and reliably, ensuring that your audience enjoys a seamless live streaming experience.
The Importance of RTMP Ingest in Broadcasting
When you’re diving into the world of live streaming, understanding the role of RTMP ingest is crucial. RTMP ingest means using the RTMP technology to encode and then deliver the live video from the encoder to the online video platform. It’s the bridge that connects your content with your audience, ensuring that your stream is transmitted smoothly and without interruption.
To get a sense of why RTMP ingest is so important, consider the following points:
- RTMP is designed for high performance and can handle the rapid exchange of audio and video data in real time.
- It provides a stable and reliable connection between your broadcasting software, like OBS, and the streaming platform.
- RTMP ingest supports a variety of encoders and is widely compatible with many online video platforms.
By mastering RTMP ingest, you’re setting the stage for a professional and seamless live streaming experience.
Remember, the quality of your live stream heavily depends on the stability of the RTMP ingest. If this step is compromised, viewers may experience buffering, interruptions, or even a complete loss of the stream. So, it’s worth investing time to ensure your RTMP ingest is configured correctly for a top-notch broadcast.
Comparing RTMP with Other Streaming Protocols
When you’re diving into the world of live streaming, you’ll quickly find that RTMP is just one of many protocols at your disposal. Each protocol, including RTMP, HLS, and SRT, has its own set of strengths and ideal use cases. For instance, while RTMP is renowned for its widespread support and compatibility with various encoders and servers, HLS is often praised for its ability to deliver content reliably across different network conditions.
RTMP’s primary role is to deliver content from an encoder to an online video host, known as RTMP ingest.
However, newer protocols like SRT offer advantages in terms of latency and error correction, which can be crucial for certain broadcasting scenarios. It’s important to weigh these factors against your specific needs. For example, if you’re considering RTMP vs. SRT, you might ask: How do RTMP and SRT compare for my particular setup? The answer will depend on factors such as your audience size, the platforms you’re streaming to, and the level of interactivity you require.
Here’s a quick comparison to help you decide:
- RTMP: Ideal for compatibility with legacy systems and simplicity in setup.
- HLS: Best for streaming over variable network conditions and reaching a wide audience on different devices.
- SRT: Suited for low-latency streaming and robust error correction, especially over unpredictable networks.
Setting Up Your Free RTMP Server with rtsp-simple-server

Downloading and Installing rtsp-simple-server
Getting your RTMP server up and running is a breeze with rtsp-simple-server. This versatile server supports not just RTMP, but also RTSP, HLS, and even WebRTC, making it a one-stop solution for your streaming needs. Download rtsp-simple-server from its official repository on GitHub to ensure you’re getting the latest version.
To start, follow these simple steps:
- Visit the rtsp-simple-server GitHub page.
- Click on the ‘Releases’ section to find the latest version.
- Download the appropriate binary for your operating system.
- Extract the files to a directory of your choice.
- Run the server using the provided executable.
Remember, no additional dependencies are needed, so once you’ve downloaded and extracted the files, you’re ready to go!
With rtsp-simple-server, you can manage multiple streams, proxy streams from other servers or cameras, and even read Prometheus-compatible metrics. It’s a robust tool that’s also natively compatible with the Raspberry Pi Camera, making it a great choice for a variety of projects.
Configuring Your Server for First Use
Once you’ve installed rtsp-simple-server, it’s time to configure it for its maiden voyage into the world of live streaming. Your server’s configuration file is the heart of its operation, dictating how it processes and handles incoming and outgoing streams. Open the configuration file, typically named rtsp-simple-server.yml, and let’s walk through the basics.
To start, you’ll want to set up the network preferences. If you’re using tools like ATAK UAS, you’ll need to specify the video broadcast type and destination IP address. For example, you might set the video broadcast type to ‘Wowza Video’ and the destination IP to something like ‘192.168.86.232’.
Remember, the key to a successful RTMP server setup is ensuring that all your network settings align with your broadcasting tools and the devices you intend to stream to.
Here’s a simple checklist to follow:
- Ensure your server’s IP address is correctly entered.
- Verify the port numbers match your network configuration.
- Confirm the stream paths are set up as per your requirements.
- Double-check all settings for typos or incorrect values.
By taking care of these details, you’re setting the stage for a smooth streaming experience. And don’t worry if you run into issues; troubleshooting is part of the learning curve.
Understanding Server Paths and Stream Management
When you’re setting up your RTMP server with rtsp-simple-server, you’ll find that managing your server paths is crucial for organizing your streams effectively. Each stream has its own unique path, which acts as an identifier and access point for both publishers and viewers. For instance, if you’re streaming a live event, you might have a path like /live/event1 for that specific stream.
rtsp-simple-server supports the ability to handle multiple streams at once in separate paths, giving you the flexibility to run various broadcasts simultaneously. Here’s a quick rundown of what you can do with server paths:
- Authenticate users for secure access
- Redirect viewers to different streams or external RTSP servers
- Control the server and streams through an HTTP API
- Implement hot reloading to update configurations without downtime
Remember, a well-organized server path structure not only simplifies management but also enhances the security and scalability of your streaming setup.
By leveraging these features, you can ensure that your RTMP server is not just a hub for video and audio streams but a dynamic platform capable of adapting to your broadcasting needs.
Publishing Live Streams to Your RTMP Server

Using ffmpeg for Simple RTMP Streaming
When you’re looking to dive into the world of free rtmp streaming, FFmpeg is your go-to tool. It’s a powerful and versatile command-line utility that can handle just about any streaming task you throw at it. To get started, you’ll need to install FFmpeg on your system, which is straightforward and well-documented across various platforms.
With FFmpeg, you can easily push your live streams to your RTMP server, ensuring a seamless broadcasting experience.
Here’s a simple step-by-step guide to get your stream up and running:
- Open your command-line interface.
- Configure your input source, whether it’s a video file or a live capture device.
- Set your output destination to your RTMP server’s address.
- Execute the FFmpeg command with the necessary parameters for streaming.
Remember, the key to successful streaming lies in the details of your FFmpeg command. Tailor your parameters to match your source and destination requirements for optimal performance.
Configuring OBS for RTMP Streaming
Once you’ve set up your RTMP server, it’s time to connect your streaming software to it. OBS Studio is a popular choice for its versatility and open-source nature. To get started, open OBS and navigate to the ‘Settings’ by clicking the button in the bottom-right corner. Select the ‘Stream’ tab from the left sidebar to access the streaming settings.
Here’s a quick guide to get you streaming:
- In the ‘Stream’ tab, set the ‘Service’ to Custom.
- Enter the URL of your RTMP server in the ‘Server’ field.
- Input the stream key you’ve configured on your RTMP server into the ‘Stream Key’ field.
- Confirm all settings by clicking ‘OK’.
Remember, the stream key is sensitive information. Keep it secure and do not share it publicly to prevent unauthorized access to your stream.
After configuring OBS, you’re ready to go live. Just hit the ‘Start Streaming’ button and your content will be sent to your RTMP server, ready for distribution. If you encounter any issues, double-check your server URL and stream key for accuracy.
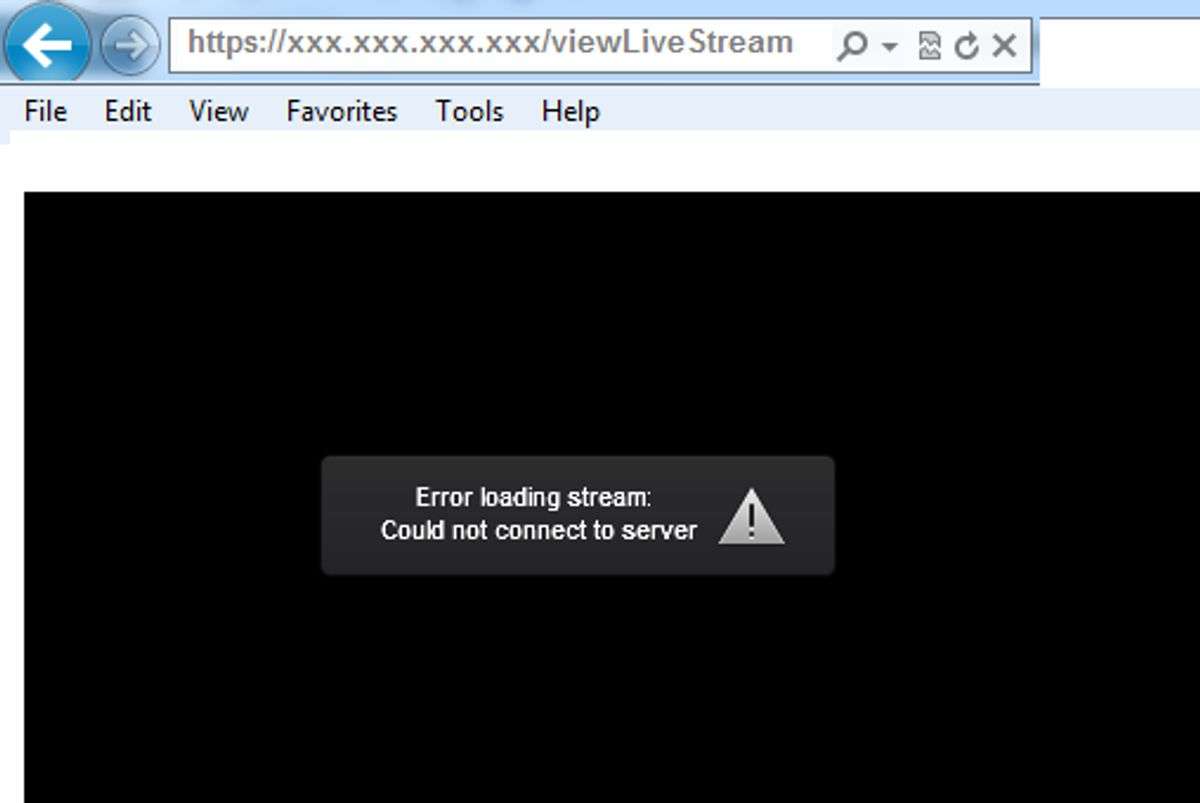
Troubleshooting Common Publishing Issues
When you’re knee-deep in the world of live streaming, encountering publishing issues with your RTMP server can be a real headache. Don’t panic! Most problems have straightforward solutions. Start by checking your encoder settings; incorrect configurations are often the culprit. Ensure that your stream key and server URL are entered correctly in your broadcasting software.
If you’re using OBS, remember to match the output settings with your RTMP server’s requirements. A mismatch in resolution or bitrate can lead to failed streams or poor quality. Here’s a quick checklist to run through:
- Verify the stream key and server URL
- Match the encoder’s output settings with the server’s specifications
- Check your internet connection for stability and speed
- Ensure your firewall or antivirus isn’t blocking the connection
Sometimes, the issue might be on the server’s end. If you suspect this, consult the server logs for any error messages. They can provide valuable clues on what’s going wrong.
Lastly, if you’re still stuck, don’t hesitate to reach out to the community. Forums and user groups are great places to find others who might have faced similar issues. Remember, patience and persistence are key when troubleshooting your RTMP server.
Reading and Playing Back Streams from Your RTMP Server

Accessing Streams via Different Protocols
Once you’ve set up your RTMP server, you’ll want to make your streams accessible to your audience, no matter what device or platform they’re using. Different protocols serve different needs, and it’s essential to understand how to leverage them for optimal stream delivery. For instance, while RTMP is great for low-latency streaming, HLS is widely supported on various devices and is often used for its ability to adapt to different network conditions.
RTMP remains the standard for live streaming due to its low latency and high compatibility with encoding software. However, you might also encounter protocols like HLS, MPEG-DASH, and WebRTC. Here’s a quick rundown of when to use each:
- RTMP: Best for live broadcasting and low-latency streaming.
- HLS: Ideal for viewers on mobile devices and browsers, offering adaptive bitrate streaming.
- MPEG-DASH: Similar to HLS but codec-agnostic, meaning it can work with a broader range of codecs.
- WebRTC: For real-time communication and interactive streams, with sub-second latency.
Remember, the key to successful streaming is not just the quality of your broadcast, but also the accessibility and reliability of the stream for your viewers.
When you’re ready to share your content, you’ll need to provide your audience with the right URLs or endpoints for the protocol they’ll be using. This ensures that everyone, regardless of their preferred platform, can enjoy a seamless viewing experience.
Integrating RTMP Streams into iOS Apps
Integrating RTMP streams into your iOS app can seem daunting, but with the right approach, it’s quite straightforward. You’ll want to ensure your app can handle live streaming effectively by using libraries that support RTMP. One popular choice is to use a video player library that’s compatible with RTMP, such as AVPlayer for native development or third-party libraries for cross-platform solutions.
To get started, follow these steps:
- Choose a suitable video player library that supports RTMP streaming.
- Implement the library into your iOS app according to the documentation.
- Configure the player with the RTMP URL of your live stream.
- Test the stream playback to ensure everything is working smoothly.
Remember, the key to a successful integration is thorough testing across different devices and network conditions to ensure a seamless user experience.
Lastly, consider the user authentication and security aspects of your stream. If your content is sensitive or you want to restrict access, you’ll need to implement appropriate measures to protect your RTMP stream.
Ensuring Smooth Playback on Various Platforms
Ensuring your audience enjoys a seamless streaming experience across different devices is crucial. Adaptive bitrate streaming is your ally here, dynamically adjusting the quality of the stream in real-time based on the viewer’s internet speed. This prevents the dreaded buffering and provides a smooth playback regardless of fluctuations in bandwidth.
To achieve this, consider the following steps:
- Determine the range of bitrates suitable for your content and audience.
- Configure your RTMP server to support multiple bitrate options.
- Test the stream on various devices to ensure compatibility.
Remember, the goal is to balance quality with accessibility. You might need to adjust quality settings and troubleshoot common issues to hit that sweet spot. Here’s a tip:
Keep an eye on your analytics to understand how your audience consumes the stream and make data-driven decisions to optimize their experience.
By taking these measures, you can cater to viewers whether they’re on high-speed connections at home or using mobile data on the go.
Leveraging RTMP for Multi-Stream Output

Setting Up Multiple Streams on a Single RTMP Application
When you’re ready to take your live streaming to the next level, setting up multiple streams on a single RTMP application can be a game-changer. Multistreaming allows you to reach a wider audience by broadcasting simultaneously across various platforms. To get started, you’ll need to configure your RTMP server to handle multiple input streams.
Firstly, ensure your server software supports multistreaming. For instance, rtsp-simple-server can serve multiple streams at once in separate paths. Secondly, create unique stream keys or endpoints for each destination. This will keep your streams organized and prevent any overlap. Thirdly, configure your broadcasting software, like OBS Studio, to send streams to the correct endpoints. Remember to check for updates regularly to ensure compatibility and access to the latest features.
By following these steps, you’ll be well on your way to efficiently managing multiple live streams, ensuring that your content reaches as many viewers as possible.
Lastly, keep an eye on the performance of your server. Multistreaming can be resource-intensive, and you want to avoid any interruptions during your broadcast. Regularly monitor your server’s load and adjust the settings as needed to maintain a smooth streaming experience.
Using Nginx RTMP Module for x.264 to HLS Conversion
When you’re diving into the world of live streaming, converting your RTMP streams to HLS can be a game-changer for compatibility and reach. The Nginx RTMP module is a versatile choice for this task, allowing you to receive an x.264 encoded stream and output it as HLS for live streaming.
Configuring the Nginx RTMP module for HLS output is straightforward. You’ll need to edit the nginx.conf file to include the hls directive within your RTMP application block. Here’s a simple example to get you started:
application live {
  live on;
  hls on;
  hls_path /mnt/hls/;
  hls_fragment 3s;
}
Remember to select your video and audio settings carefully to ensure optimal stream quality. For instance, you might choose an RTMP stream resolution, such as 1920 x 1080, to balance quality with bandwidth considerations.
Keep in mind that HLS streaming requires segmenting your video into smaller, downloadable files, typically of a few seconds each. This process is crucial for smooth playback across various devices and platforms.
Lastly, don’t forget to test your setup thoroughly. Troubleshooting common issues early can save you a headache later, especially when dealing with synchronization and interruption challenges.
Managing Bandwidth and Quality for Multiple Streams
When you’re juggling multiple streams, managing bandwidth and quality becomes a balancing act. You want to deliver the best possible experience to all viewers, regardless of their internet speed. One approach is to use adaptive bitrate streaming, which adjusts the stream quality in real-time based on each viewer’s connection speed, ensuring a smooth experience without prolonged buffering.
Remember, your internet speed should be at least double your streaming bitrate to avoid buffering issues.
Here’s a quick guide to setting your bitrates for optimal streaming:
- Video Bitrate: This determines the visual quality of your stream. A higher bitrate means better quality but requires more bandwidth.
- Audio Bitrate: Don’t overlook audio; it’s just as important for viewer satisfaction. Adjust to balance quality with bandwidth.
- Internet Speed Test: Regularly check your upload speed to ensure it can handle your streaming settings.
By customizing your OBS settings through the Video and Audio tabs, you can achieve higher video and audio quality. Just be mindful of your internet connection’s capabilities to prevent buffering for your viewers.
Advanced RTMP Server Configurations

Customizing RTMP Endpoints for Various Platforms
When you’re diving into the world of live streaming, you’ll quickly realize the need to tailor your RTMP server to fit different platforms. Customizing your RTMP endpoints is crucial for ensuring your content reaches your audience, no matter where they are. Each platform, from Twitch to YouTube, has its own requirements and quirks that you’ll need to accommodate.
For instance, you might need to adjust the stream’s bitrate, resolution, or even the codec settings to match the platform’s specifications. Here’s a simple checklist to help you keep track of these customizations:
- Verify the platform’s streaming requirements
- Adjust bitrate and resolution as needed
- Select the appropriate codec and container format
- Configure authentication and privacy settings
Remember, a well-configured RTMP endpoint can mean the difference between a smooth streaming experience and a technical nightmare for your viewers.
By taking the time to customize your RTMP server for each platform, you’re not just tweaking settings; you’re optimizing the viewer’s experience. And with tools like Dacast, you can even multi-stream to multiple platforms, ensuring your content has the broadest reach possible.
Securing Your RTMP Server
When you’re setting up your RTMP server, security should be at the forefront of your mind. Protecting your streams from unauthorized access is crucial. Start by implementing authentication for users. This can be done internally or by integrating external authentication systems.
To further secure your server, consider the following steps:
- Use secure connection protocols like RTMPS, which adds a layer of SSL/TLS encryption.
- Regularly update your server software to patch any vulnerabilities.
- Configure firewalls and access control lists to restrict access to necessary ports and IP addresses only.
- Monitor server logs to detect and respond to any unauthorized access attempts.
Remember, a secure RTMP server not only protects your content but also ensures the privacy and safety of your viewers.
By taking these measures, you’ll create a robust security framework for your RTMP server, giving you and your viewers peace of mind.
Optimizing Server Performance for High Traffic
When your RTMP server starts to attract more viewers, it’s crucial to ensure that it can handle the high traffic without hiccups. Adaptive bitrate streaming is your friend here; it dynamically adjusts the stream’s quality based on each viewer’s connection speed, providing a smooth experience for everyone.
- Use progressive signal flows; avoid interlaced video in production and encoding.
- Implement authentication for users, and consider load balancing by redirecting to other RTSP servers.
- Employ hot reloading to update configurations without disrupting current viewers.
- Monitor server performance with Prometheus-compatible metrics and automate processes with external commands upon client actions.
Remember, the goal is to deliver uninterrupted, high-quality content to your audience, regardless of the number of concurrent viewers.
By taking these steps, you’ll not only improve the viewer experience but also prepare your server for future growth. Keep an eye on your server’s metrics and make adjustments as needed to maintain optimal performance.
Integrating RTMP with External Services and Platforms

Streaming to Twitch: Adding and Configuring Endpoints
Ready to share your live content with the Twitch universe? Let’s get your RTMP server talking to Twitch. First, you’ll need to navigate to your RTMP server’s control panel and find the option to Edit RTMP Endpoints. Here, you’ll add your Twitch channel’s RTMP endpoint.
To ensure a smooth experience, select the RTMP server closest to your location from ingest.twitch.tv/ingests and pair it with your unique stream key from your Twitch account.
Once you’ve configured the endpoint, it’s time to go live. Hit that Start Broadcasting button and keep an eye on your Twitch channel to confirm that your stream is up and running without any hiccups. Remember, a successful stream is one that’s free from interruptions and sync issues.
Here’s a quick checklist to guide you through the process:
- Access your RTMP server’s control panel
- Click
Edit RTMP Endpoints - Add Twitch channel RTMP endpoint
- Use the server from ingest.twitch.tv/ingests
- Enter your Twitch stream key
- Click Start Broadcasting
And just like that, you’re live! Keep an eye on the stream to ensure everything is in sync and interruption-free. Happy streaming!
Pulling Streams from External Sources
When you’re looking to enhance your live streaming capabilities, pulling streams from external sources can be a game-changer. You can aggregate content from various platforms and redistribute it through your RTMP server, creating a more diverse and engaging experience for your viewers.
To get started, you’ll need to identify the source URLs of the streams you wish to pull. This could be from platforms like YouTube, Twitch, or any other service that provides a stream URL. Once you have these, you can use tools like ffmpeg or node-media-server to ingest the external streams into your server.
Here’s a simple step-by-step guide to pulling an external HLS stream and pushing it to your RTMP server:
- Retrieve the HLS stream URL from the external source.
- Use
ffmpegto convert the HLS stream to RTMP format. - Push the converted stream to your RTMP server using the appropriate ingest settings.
- Configure your server to handle the new stream and distribute it to your audience.
Remember, it’s crucial to respect copyright and licensing agreements when pulling streams from external sources. Ensure you have the right to redistribute the content you’re pulling to avoid legal complications.
Setting Up Custom Destinations for Your Content
Once you’ve got your RTMP server up and running, you’ll want to connect it to various platforms to maximize your content’s reach. Setting up custom destinations is a straightforward process, but it’s crucial to get it right to ensure a seamless streaming experience.
To begin, navigate to the Destinations page of your streaming service. Here’s a simple guide to get you started:
- Locate the ‘Custom’ option and select ‘Setup’.
- Name your custom destination for easy identification.
- Input the RTMP endpoint URL provided by your chosen platform.
- Enter the stream key, which is also platform-provided, or opt to request it when you go live.
Remember, each platform may have specific requirements for live streaming. Always check these beforehand to avoid any hiccups during your broadcast.
If you’re using a service like StreamYard, the process might look like this:
- Head to the Destinations page, and click ‘Add a destination‘.
- Select ‘Custom RTMP’.
- Fill in the ‘RTMP server URL’ field, and the stream key in the respective inputs.
By setting a destination as default, you can streamline your streaming setup, making it the first choice whenever you start a live stream. This is particularly handy if you frequently broadcast to the same platform.
Monitoring and Analytics for Your RTMP Streams
Tools for Monitoring Stream Health and Performance
Keeping an eye on your stream’s health and performance is crucial to ensure a smooth experience for your viewers. Real-time analytics play a pivotal role in this process, allowing you to monitor metrics such as viewer count, stream stability, and bitrate in real-time. Tools like Restream provide a dashboard where you can watch these metrics change as your stream progresses.
When selecting a monitoring tool, consider features like multistreaming capability, which can be essential if you’re broadcasting to multiple platforms simultaneously. Here’s a quick list of features to look for in a good monitoring tool:
- Real-time analytics
- Alerts for stream issues
- Multistreaming support
- Closed captioning support
- Hot reloading for configuration changes
Remember, the key to a successful live stream is not just the content but also the quality of the delivery. Regularly checking on the health and performance of your stream can preempt many issues before they affect your audience.
Lastly, don’t overlook the importance of a user-friendly interface. Platforms like Riverside offer a seamless experience, which is especially beneficial if you’re new to live streaming. By staying vigilant and using the right tools, you can maintain a high-quality stream that keeps your audience engaged.
Analyzing Viewer Engagement and Metrics
Understanding your audience’s behavior is crucial for the success of your live streams. Start by tracking simple metrics like the number of viewers, which gives you a baseline of your stream’s reach. But don’t stop there; delve deeper into live vs on-demand viewership, and keep an eye on the activity levels in your live chat. These insights can help you tailor your content to what your audience enjoys most.
To effectively measure engagement, consider the following metrics:
- Watch time: How long viewers stay tuned in.
- Unique visitors: The number of individual viewers.
- Interaction rate: Frequency of comments or likes.
- Conversion rate: Viewers taking a desired action.
By analyzing these metrics, you can identify trends and patterns that inform your content strategy, helping to increase viewer retention and attract new audiences.
Remember, engagement is not just about numbers; it’s about building a community. Engage with viewers through platforms like Discord, which offers live text and voice chat features, allowing for real-time interaction. Promoting your streams on social media can also boost your visibility and draw in a larger crowd.
Using Analytics to Improve Stream Quality
Harnessing the power of analytics can be a game-changer for your live streaming quality. By monitoring key performance indicators, you can make informed decisions to enhance the viewer experience. Keep a close eye on metrics like viewer drop-off rates and engagement levels to understand what keeps your audience hooked.
Analytics tools can provide you with a wealth of data, but it’s crucial to focus on the most impactful metrics. Here’s a simple list to get you started:
- Average view duration
- Peak concurrent viewers
- Buffering and load times
- Geographic distribution of viewers
Remember, the goal is to use this data to identify trends and patterns that can inform your content strategy and technical adjustments.
Adaptive bitrate streaming is another technique to consider. It adjusts the stream quality in real-time based on each viewer’s internet speed, ensuring a smooth experience without prolonged buffering. Lastly, don’t forget to configure your RTMP encoder with details such as stream quality and access control, tailoring your setup to the specific needs of your broadcast.
Troubleshooting Common RTMP Server Issues
Diagnosing Connectivity Problems
When you’re in the thick of setting up your live stream, encountering connectivity issues can be a major roadblock. First and foremost, ensure that your RTMP URL and stream key are accurate. These are the lifelines of your stream to the server, and even a small typo can prevent a successful connection.
Network configuration plays a crucial role in the streaming process. If you’re using an ATEM switcher, verify that your network settings are correctly configured to allow RTMP traffic. Sometimes, firewalls or incorrect router settings can block the necessary ports.
If you’ve double-checked your settings and still can’t generate a test link, consider alternative methods for testing your connection. Tools like ffmpeg can simulate a stream to your RTMP server, providing a quick way to validate your setup.
Here’s a simple checklist to follow if you’re facing connectivity problems:
- Confirm that the RTMP URL is correctly entered.
- Ensure the RTMP Key is accurately inputted.
- Check your network’s firewall and router settings.
- Test the connection with alternative tools if necessary.
Remember, patience and systematic troubleshooting are your best allies when resolving these issues.
Resolving Synchronization and Interruption Challenges
When you’re live streaming, few things are as frustrating as dealing with synchronization issues and interruptions. Ensuring a seamless experience for your viewers is crucial, and there are steps you can take to minimize these problems. First, check your network stability. A wired connection is often more reliable than Wi-Fi for streaming purposes.
Next, consider using a backup stream. This can be a lifesaver if your primary stream encounters issues. Services like Restream offer unified chat features, allowing you to manage interactions across platforms without missing a beat, even if you need to switch streams.
Remember, a smooth stream is not just about a stable connection, but also about the right server configurations and software settings.
If you’re using multiple streams, ensure they are set up on separate paths to avoid cross-interference. For Twitch streamers, adding your channel’s RTMP endpoint and choosing a server close to your location can help reduce latency and improve synchronization.
Lastly, don’t forget to regularly update your streaming software and server configurations. Keeping everything current can prevent many issues before they start.
Handling Codec and Format Incompatibilities
When you’re knee-deep in the world of live streaming, you’ll quickly realize that not all codecs and formats play nicely with every system. It’s crucial to ensure compatibility between your source video and the RTMP server you’re using. For instance, the widely accepted video codec for RTMP streaming is H.264, which is compatible with most platforms and devices.
Here’s a quick checklist to help you align your settings with common RTMP requirements:
- Video Codec: H.264 (x264 may work)
- Frame Rate: 25 or 30
- Keyframe Interval: 3 secs (or 3x frame rate)
- Scanning: Progressive
- Bitrate: Constant Bitrate (CBR)
- Audio Codec: AAC
- Audio Bitrate: 128 Kbps
- Audio Channels: 2 (Stereo)
- Audio Sample Rate: 48 kHz
Remember, these settings are a starting point. You may need to tweak them depending on the specific requirements of your RTMP server or the platform you’re streaming to.
If you encounter issues, it’s often a matter of trial and error to find the right combination of settings. Don’t hesitate to consult the documentation of your RTMP server or reach out to the community for advice. After all, a particular stream setup with RTMP protocol would look like this: Record the stream with an RTMP-compatible camera or encoder, ensuring that your equipment is up to the task.
Expanding Your RTMP Server Capabilities
Introducing WebRTC and LL-HLS for Low Latency Streaming
When you’re aiming for the ultra-low latency that modern live streaming demands, you’ll want to explore WebRTC and LL-HLS (Low-Latency HTTP Live Streaming). These technologies are game-changers for interactive applications like gaming, auctions, or live sports, where every second counts.
WebRTC is a real-time communication protocol that enables direct, peer-to-peer connections, allowing for sub-second latency. On the other hand, LL-HLS is an extension of the traditional HLS protocol, designed to reduce latency without sacrificing the scalability and reliability HLS is known for.
Here’s a quick comparison to help you understand the differences:
- WebRTC: Ideal for real-time interaction, supports sub-second latency.
- LL-HLS: Balances low latency with HLS’s benefits, typically achieves latency of a few seconds.
While WebRTC is perfect for achieving near real-time streaming, LL-HLS offers a more scalable solution that’s still significantly faster than traditional HLS.
Remember, implementing these protocols may require additional configuration and resources. It’s crucial to assess your needs and the capabilities of your RTMP server to ensure a smooth transition to low latency streaming.
Scaling Your Server for Larger Audiences
As your live streaming audience grows, scaling your RTMP server becomes crucial to maintain a seamless viewing experience. Ensuring your server can handle increased traffic is key to avoiding disruptions during peak times. Start by evaluating your current server’s performance and capacity. If you notice lag or downtime when your audience size spikes, it’s time to consider scaling up.
- Assess current server capacity
- Monitor peak traffic times
- Upgrade hardware or bandwidth as needed
- Consider load balancing solutions
One effective strategy is to implement load balancing, which distributes traffic across multiple servers to prevent any single server from becoming overwhelmed. This not only improves reliability but also enhances the quality of your streams. Additionally, upgrading your server’s hardware or increasing bandwidth can provide the necessary boost to accommodate a larger audience.
Remember, the goal is to provide a smooth streaming experience that keeps your viewers engaged and coming back for more. Don’t let technical limitations hinder the growth of your audience.
Finally, keep an eye on your analytics. Understanding viewer behavior and peak viewing times can help you make informed decisions about when to scale. Regularly reviewing these metrics ensures you’re always one step ahead, ready to deliver high-quality content to your ever-growing audience.
Exploring Open Source Resources and Community Support
When you’re ready to expand the capabilities of your RTMP server, the open source community is a treasure trove of resources. Platforms like GitHub offer a myriad of projects that can inspire or even serve as the foundation for your streaming solutions. For instance, you might come across a project like [josephnhtam/live-streaming-server-net](https://github.com/josephnhtam/live-streaming-server-net) on GitHub, which is a .NET implementation of an RTMP server with support for various streaming formats.
- Open Source Platforms to Explore:
- GitHub: Repositories, trending projects, and community articles
- Stack Overflow: Community Q&A and discussions
- Open Source Software Directories: Curated lists of frameworks and tools
By engaging with these platforms, you can find support articles, learn from case studies, and even get 24/7 community support. It’s essential to leverage these resources to not only solve technical challenges but also to stay updated with the latest features and best practices in the streaming domain.
Embrace the collaborative spirit of the open source community to enhance your RTMP server’s functionality and reliability.
Conclusion
Setting up a free RTMP server can seem daunting at first, but with the right tools and a step-by-step guide, it’s entirely achievable. Throughout this article, we’ve explored the versatility of RTMP servers, such as rtsp-simple-server, and how they can handle multiple streaming protocols and formats. Whether you’re looking to stream to Twitch, set up a custom destination, or manage multiple streams, the process is now demystified. Remember, the key to a smooth streaming experience lies in understanding the configurations and testing your setup thoroughly. So go ahead, start broadcasting, and let the world tune into your live content!
Frequently Asked Questions
What is RTMP and why is it important for live streaming?
RTMP stands for Real-Time Messaging Protocol and is crucial for live streaming as it enables the delivery of content from an encoder to an online video host. This delivery method is known as ‘RTMP ingest’ and is essential for broadcasting live video streams.
How does rtsp-simple-server facilitate RTMP streaming?
rtsp-simple-server is a ready-to-use server that allows users to publish, read, and proxy live video and audio streams using different protocols. It can convert streams from one protocol to another, for example, from RTSP to HLS, making it versatile for various streaming needs.
What are the steps to set up streaming to Twitch using RTMP?
To stream to Twitch via RTMP, edit the RTMP endpoints in your streaming software, add your Twitch channel’s RTMP endpoint from Twitch’s ingest list, and use your stream key. Finally, start broadcasting and ensure the stream plays without interruptions on Twitch.
How can I publish multiple streams on a single RTMP application?
To publish multiple streams on a single RTMP application, configure your server, such as Nginx with the RTMP module, to handle multiple stream paths. You can also use software like ffmpeg to push streams to different endpoints simultaneously.
What are common issues when setting up RTMP streaming and how can I troubleshoot them?
Common RTMP streaming issues include connectivity problems, synchronization errors, and codec incompatibilities. Troubleshooting involves checking network settings, ensuring compatible encoding formats, and verifying that the stream paths are correctly configured.
Can I integrate RTMP streams into iOS apps?
Yes, RTMP streams can be integrated into iOS apps. You will need to use a player or framework that supports RTMP streaming to access and play the streams within the app.
How do I configure an RTMP server for HLS conversion using Nginx?
To configure an RTMP server for HLS conversion using Nginx, you need to set up the Nginx RTMP module to receive x.264 streams and output them as HLS live streams. This involves editing the Nginx configuration file to specify the RTMP and HLS settings.
What is the process for adding a custom RTMP destination for my content?
To add a custom RTMP destination, find the ‘Custom’ setup option in your streaming software, give a name to your destination, enter the RTMP endpoint URL and stream key provided by your streaming platform, or request the stream key when starting the live stream.